
On Blobs, Files and Data URIs in Javascript
I’ve been working with Files, Blobs and DataURIs recently, and have found the whole thing just very confusing. What is the difference between the three, and how do the various methods around them work (createObjectURL, readAsDataURL and the various FileReader methods).
Because it’s not just one topic that I can StackOverflow my way out of, I decided to step back and try and piece together the different parts into a coherent model. That’s what this post is about…
First things first
We’ll be talking about files here. My initial impression was that files needed to be uploaded to a server for anything useful to happen with them.
Turns out, that’s just plain wrong.
There’s A LOT that you can do with file using just some good ole’ Javascript.
To give you a taste, here are a few examples:
- Reading file properties (name, file size, image dimensions)
- Converting files between different formats (e.g. png -> jpeg)
- Acccessing file contents
Remember, all this can be done ENTIRELY client-side.
We’ll cover ground in 2 main steps:
- Accessing file contents
- Modifying the DOM
Accessing file contents
Let’s start by looking at how to give Javascript access to our file. This bit is pretty much what you’d expect — we’ll be using an <input type=file>.
Once a user selects a file using the ‘Browse’ button, the change event is triggered. As soon as that’s done, we show the image.
The code below that does just that:
var input = document.querySelector('input[type=file]')
input.addEventListener('change', onFileChange)

function onFileChange() {
  var file = input.files[0]
  document.querySelector('img').src = URL.createObjectURL(file)
}
Here’s a demo 👇 you can try with any image. Go ahead, try it:
Pretty simple, huh? Works entirely offline too.
We’ll get to URL.createObjectURL() in a bit, but the point is that you’ve seen that we can access file “data” using just Javascript.
Blobs & Data URIs
I’ve been pretty vague in my use of the word “data” so far, so let’s clear that up. We can represent file contents in two primary forms, depending on how you’re using it:
- Data URIs (Base64 encoded strings) — these are great when you’re stuffing the data directly into an HTML attribute (e.g.
<img src="data:image/png...">). It all just works, without any Javascript in sight. - Blobs (or Binary Objects) — useful when you’re dynamically updating HTML attributes using Javascript (like we did with the image preview in the prior example). We’ll see that an
<input type=file>uses Blobs.
If it’s still unclear, think about it this way: the difference between Data URIs and Blobs are like the difference between a glass of water and a lake:
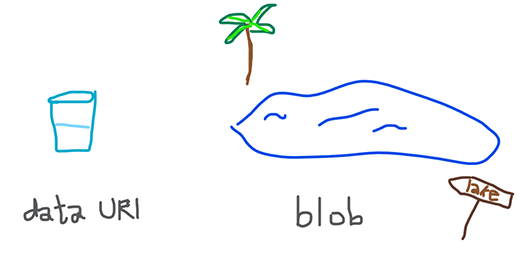
When you’re handing someone a glass of water, you just - well - give it to them. Similarly, you can hand <img> tags a DataURI and it would just display it like it’s a normal URL — without searching for the image or making an external HTTP call.
That’s not how it works with a lake though. You don’t just hand someone a lake. When you want someone to go see a lake, you send them directions to it. Similarly when you want someone to see a Blob, you don’t just add the Blob directly in the <img> or <a href="...">. You have to give it an Object URL first, using createObjectURL (that we saw earlier).
In summary:
| Blob | DataURI |
|---|---|
| ⬜ Set using JS | ✅ Set using HTML or JS |
| ⬜ Requires ObjectURL before use in HTML elements | ✅ Can be used as direct source in HTML attributes |
| ✅ Efficient storage (binary) | ⬜ Less efficient (Base64 encoded) |
Modifying the DOM
Blobs and DataURIs are often used in conjunction with these tags:
<img>— for displaying files, or retrieving image information (width, height, etc)<a>— for downloading data locally, without a remote resource<canvas>— for converting image formats (e.g. JPEG -> PNG, or vice versa)
I’ve included a few examples below that illustrate how to modify the DOM using
DataURI 🥛
DataURIs can be passed directly into HTML elements like so:
<img src="data:image/png;base64,iVBORw0KGgoAAAANSUhEUgAAAGQAAABkCAYAAABw4pVUAAAA8UlEQVR4nO3X0Q2CMBQF0DeLcziIkzAKszAMu9QPIQFSqqUfEjgnaYiSkvqu5LURAAAAAAAAAAAAAAAAAADAuQzTyHlGRJquv3pNcx7T5zEi+sOruyGBnIxATuZIIGkxxs29XwIpzb+92kBSrAvcx7qopUAeO/PTkYVf1RDrf2xuzIF0kS9eik8QEeVAtuEt53ctP+JKat6QIfL9YPl9KZC9ftIX1nA7NYGMsf8Wzc8QSKPaQL7tmI4EUlrD7dQEstcDloXWQxrVBJLbJc2Nfg7ALqtR6zlkW0znEAAAAAAAAAAAAAAAAAAAAAAAAAD+5A1s+4fOp2st6wAAAABJRU5ErkJggg==">
… resulting in this:

Doesn’t get much simpler than that. Of course, you can achieve the same result dynamically using Javascript (but you’re really better off using a Blob instead):
let img = new Image()
img.src = "data:image/png;base64,iVBORw0KGgoAAAANSUhEUgAAAGQAAABkCAYAAABw4pVUAAAA8UlEQVR4nO3X0Q2CMBQF0DeLcziIkzAKszAMu9QPIQFSqqUfEjgnaYiSkvqu5LURAAAAAAAAAAAAAAAAAADAuQzTyHlGRJquv3pNcx7T5zEi+sOruyGBnIxATuZIIGkxxs29XwIpzb+92kBSrAvcx7qopUAeO/PTkYVf1RDrf2xuzIF0kS9eik8QEeVAtuEt53ctP+JKat6QIfL9YPl9KZC9ftIX1nA7NYGMsf8Wzc8QSKPaQL7tmI4EUlrD7dQEstcDloXWQxrVBJLbJc2Nfg7ALqtR6zlkW0znEAAAAAAAAAAAAAAAAAAAAAAAAAD+5A1s+4fOp2st6wAAAABJRU5ErkJggg=="
Any image can be represented as a Data URI. Here’s a handy tool that you can use to see what the Data URI representation of your image looks like:
Your Data URI output (👆 choose a file first):
Blob 🌊 (<- Supposed to be a lake)
We can’t pass Blobs directly into HTML elements; we’ll need to use Javascript for that. Let’s revisit the earlier example that shows an image preview when a file is selected:
<input type="file">
var input = document.querySelector('input[type=file]')
input.addEventListener('change', onFileChange)

function onFileChange() {
  var file = input.files[0]
  document.querySelector('img').src = URL.createObjectURL(file)
}
We access our file using input.files[0] (or loop through them if multiple=true). The cool part is that a file is just a Blob:
var file = input.files[0]
file instanceof Blob /* is true */
To tie up the Blob with our image, we use a pointer in the form of an Object URL. That’s easy to do:
var objUrl = URL.createObjectURL(file);
// objUrl = "blob:http://domain.com/{36-char-long-hex-string}
The 36 character long hex string is just a pointer that points to our Blob. It’s only valid while the document is loaded, so if you were to refresh the page and set the same Object URL to an image you create, it just wouldn’t work.
Common Applications
Now that you know what the terms are, and how to tell them apart, let’s look at some common use-cases:
1. Displaying an image preview (without uploading to a server)
This one’s easy, we’ve already seen it:
var input = document.querySelector('input[type=file]')
input.addEventListener('change', onFileChange)

function onFileChange() {
  var file = input.files[0]
  // set the <img> src to 'blob://...'
  document.querySelector('img').src = URL.createObjectURL(file)
}
Live demo (pick any image)
2. Checking image width/height
You can do this too, by feeding the blob into an Image():
var blob = elemFile.files[0]; // <input type=file>
var img = new Image();
// set the onload *before* setting the img 'src'
img.onload = e =>
  console.log(`Your lovely image is ${img.width} x ${img.height}px`);

img.src = URL.createObjectURL(blob);
Check it out here:
3. Uploading an image via AJAX
Believe it or not, this is even easier to do — since it doesn’t require an object URL at all!
Check it out:
fetch('https://mywebsite.com/upload/', { method: 'POST', body: blob })
  .then(response => {
    if(response.ok) console.log('✅ All good in this hood!');
    else throw Error('Run for it!');
  })
4. Converting an image to Data URI
This one’s pretty easy:
var input = document.getElementById('myfile');
input.addEventListener('change', showDataURI);

function showDataURI() {
  var output = document.getElementById('output');
  var file = input.files[0];

  var reader = new FileReader();
  reader.onload = (e) => { // set onload *before* calling readAsDataURL()
    output.innerText = e.target.result;
  }
  reader.readAsDataURL(file);
}
And a demo for your viewing pleasure 👇
Your Data URI output:
5. Converting from PNG -> JPG (entirely using JS)
Didn’t think this was even possible? Think again, my friend! All it takes is our good friend blob and a trusty Canvas.
Lo and behold:
<input type='file' id='file' onChange='performConversion()'>
<img id='preview'>
function performConversion() {
  var preview = document.querySelector('#preview');

  createImage(file.files[0])
    .then(png => toJpg(png))
    .then(jpg => preview.src = URL.createObjectURL(jpg));
}

// Converts the blob to an Image (just like before)
const createImage = (blob) => new Promise((resolve, reject) => {
  if(blob.type != 'image/png') reject('Only accepts PNGs!');

  var img = new Image();
  img.onload = e => resolve(img);
  img.src = URL.createObjectURL(blob);
});

// Converts the (PNG) image to JPG using Canvas
const toJpg = (img) => new Promise((resolve, _) => {
  var canvas = document.createElement('canvas');
  canvas.width = img.width;
  canvas.height = img.height;

  var ctx = canvas.getContext('2d');
  ctx.drawImage(img, 0, 0);

  canvas.toBlob(resolve, 'image/jpeg', 0.15); // 15% quality 💩
});
And here’s a demo (just make sure to pick a PNG):
Parting notes
There’s alot here that I haven’t covered, and so I’m sharing some references below if you’re curious to learn more.